How to Set Up Ruckus Unleashed Using Your Mobile Device
Learn how to easily set up your Ruckus Unleashed Access Point using your mobile phone or tablet with this simple step-by-step guide.
Before You Begin
To ensure a smooth setup process, make sure you have completed these quick preparation steps:
Verify that your Ruckus Unleashed Access Point (AP) is powered on and connected to your local router or switch using an Ethernet cable.
Wait for the lights on the AP to stabilize. The "CTL" or "DIR" light should flash green or amber, which means it is ready to be configured.
Make sure your mobile device has Wi-Fi turned on.
Warning: Do not unplug the power or Ethernet cables during this process. The Access Point will restart automatically to apply your new settings.
Step-by-Step Mobile Setup
Step 1: Connect to the Setup Wi-Fi Network
Open the Wi-Fi settings on your mobile device. Look for the temporary setup network broadcasted by your Ruckus device. This network name typically starts with Configure.Me- followed by letters or numbers (for example, Configure.Me-XXXXXX). Select this network to connect.
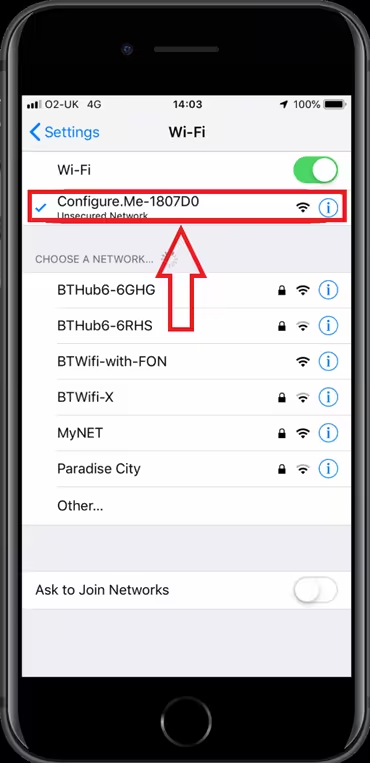
Source: pinky_ruckus_0-1753125833828.png
Step 2: Open the Ruckus Unleashed App
Once connected to the setup Wi-Fi, open the Ruckus Unleashed app on your mobile device. If you do not have it installed, download it from your device's app store. The app will automatically detect the new Access Point and guide you through creating your permanent Wi-Fi network name and password.

Source: pinky_ruckus_1-1753125833841.png
Sources
This article was researched from the following documentation.